
Are you wondering what is Cricut Print Then Cut and how to use it in Design Space software? You are at the right rescue place. In this post, we’ll discuss what is print then cut, whether print then cut is available for all Cricut machines, and how to print and then cut in Design Space.
Today we’re diving into the Design Space software and learning all about this handy feature. Unfortunately, the Cricut Joy machine doesn’t have a Print Then Cut feature at this time. The best thing is that you can use it with Cricut Explore and Cricut Maker models.
With this Print Then Cut feature, you can print all kinds of things on your printer using the Cricut machine. Some great project ideas include stickers, gift tags, home decorations, name tags, banners, photo booth props, birthday cards, and bag toppers.
What Is Cricut Print Then Cut?
Cricut Print Then Cut is a feature of the Design Space software where you use your printer in conjunction with the Cricut machine to print a picture, then cut it out. The Cricut Print Then Cut feature is the proprietary name of Cricut Print and Cut.
Does The Print Then Cut Feature Work For All Cricut Machines?
Here are the Cricut machines that work for the Print Then Cut feature:
- Cricut Maker
- Cricut Maker 3
- Cricut Explore 3
- Cricut Explore Air 2
- Cricut Explore Air
How To Cricut Print Then Cut In the Design Space App?
Bring some beautiful colors to your craft project with the Cricut Print Then Cut feature. Print images on your printer (inkjet only) and then cut with the Cricut machine with high accuracy.
Note: The Cricut Print Then Cut feature can be used with the Cricut Maker and Explore machines. The Cricut Joy machine can only cut and draw.
Steps To Make Images Printable
You can transform any image into printable by changing the Linetype. Use the Flatten tool from the Layers panel to transform multiple layers to print at once.
The Cricut Image Library consists of Printable images that are pre-created with designs. Those Cricut Print Then Cut designs come on the screen. They appear as a single layer in the Layers panel and have a print line type, showing that the image will be printed on your printer, then cut on Cricut Maker or Explore.
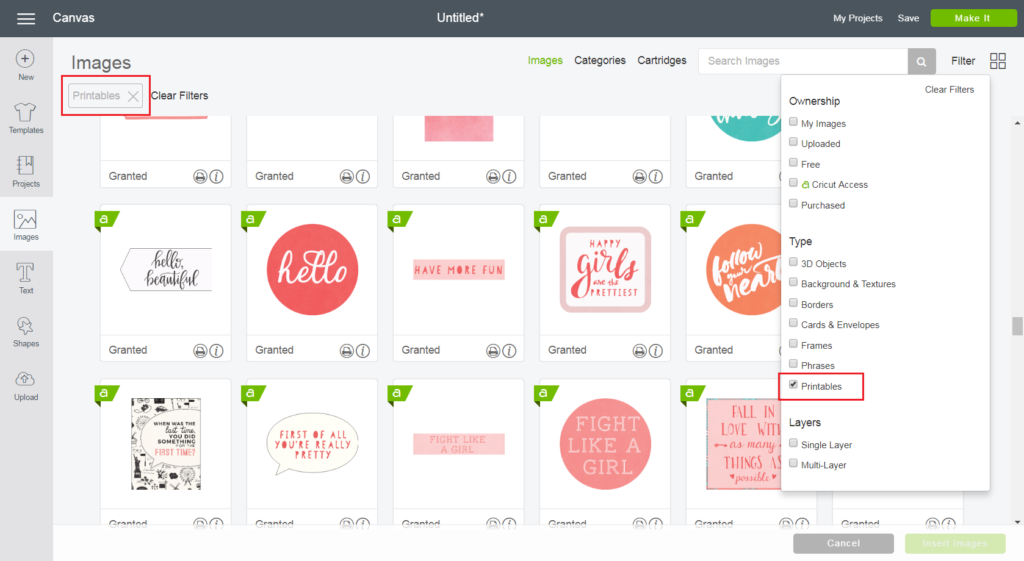
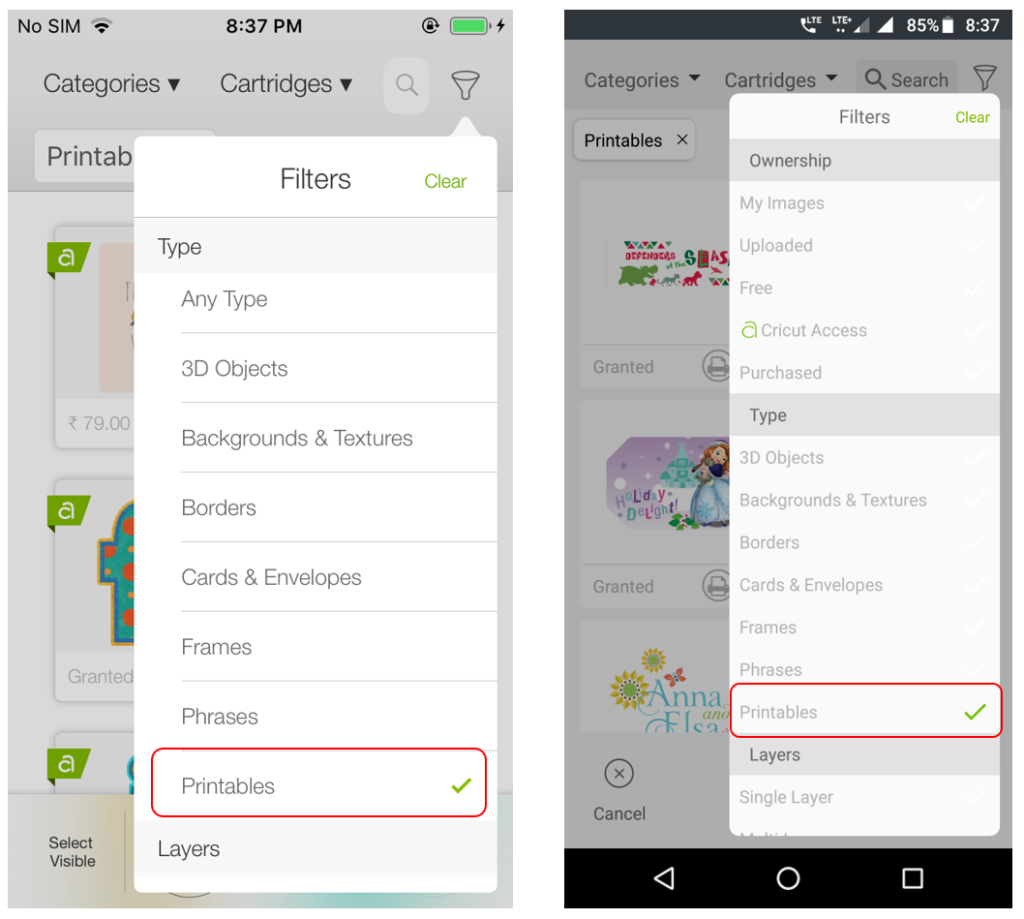
You can find the Printables option by pressing the Filter sign and checking the Printable box. Click on the Printable image, add it to Canvas, and press the Make It button to start the Cricut Print Then Cut feature.
For Windows/Mac
For iOS/Android
Steps To Cricut Print Then Cut Projects
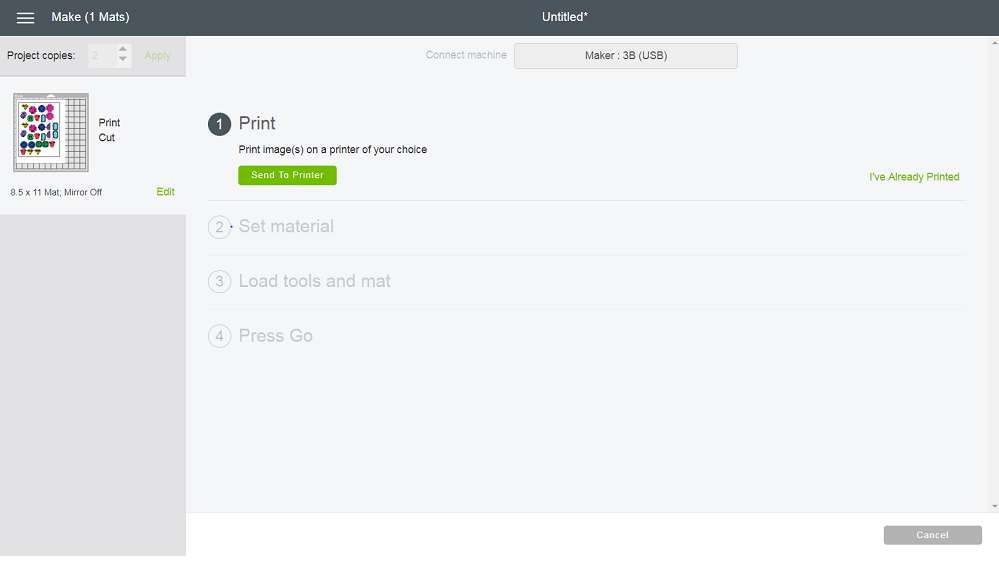
- Once you’ve inserted an image into a project, click on the Make it button from the Design Space app.
- Then, press the Continue button to initiate the cut interaction.
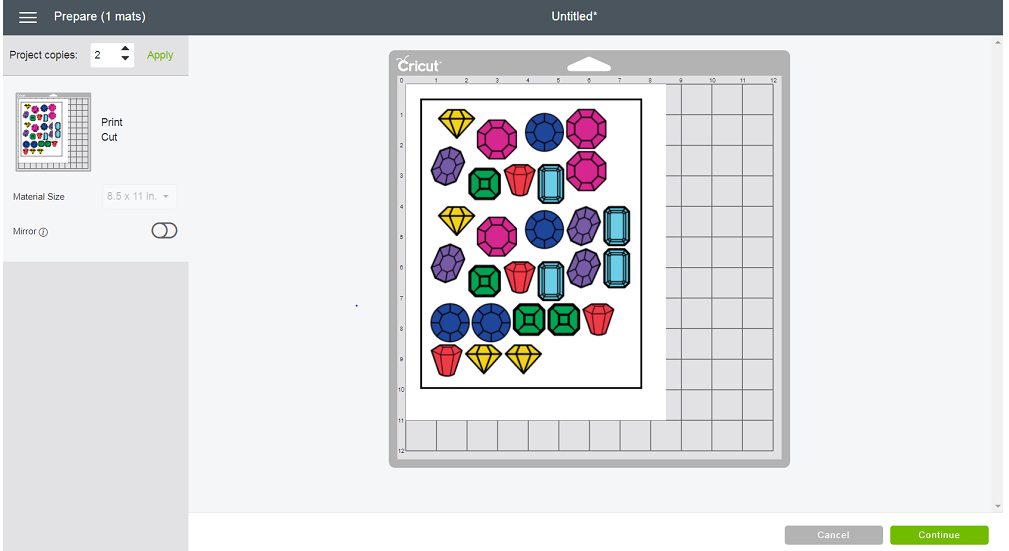
- Click on the next screen, and choose Cricut machine from its drop-down menu.
- After that, choose the Send to Printer option to open the Print to Cut dialog box.
- Image bleed will be applied to an image, so there’s no white border left after the cut is done.
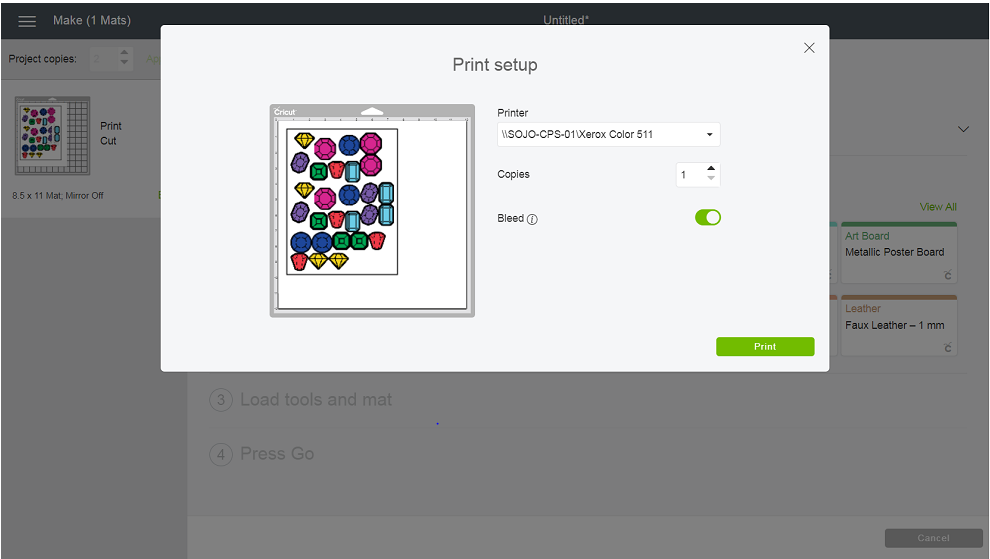
- Print the page using your printer put the paper on a cutting mat, and feed it to the machine.
- Your machine scans for sensor markings and precisely cuts around the image.
Note: For the Cricut Print Then Cut feature, you will need a maximum image size of 9.25″ x 6.75,” and the default material is 8.5″ x 11″.
How To Calibrate The Cricut Machine For Print Then Cut?
Cricut Print Then Cut calibration will ensure that the Cricut machine cuts accurately at the edge of your printed images. Then, select your operating system in the section below for step-by-step guidelines.
Note: The Cricut Print Then Cut feature is currently unavailable on Android devices.
For Windows/Mac
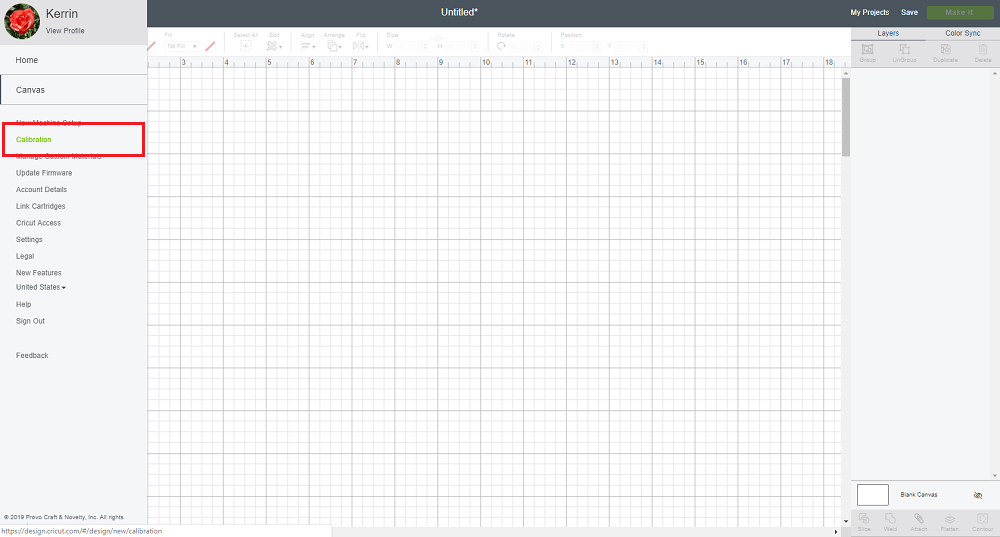
- As your initial steps, you have to sign in to the Design Space software.
- Then, click on the Account menu. Select the Calibration section.
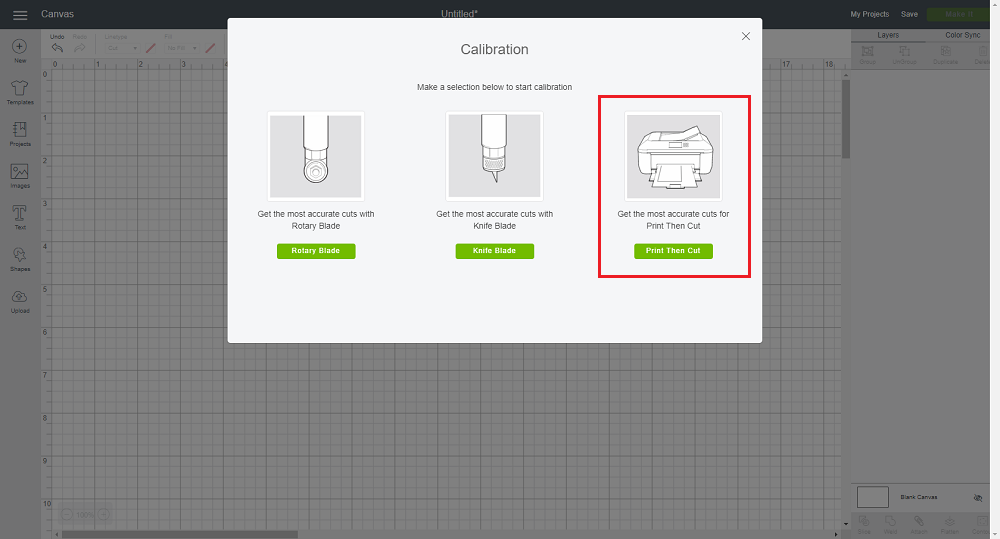
- After that, select the Print Then Cut option.
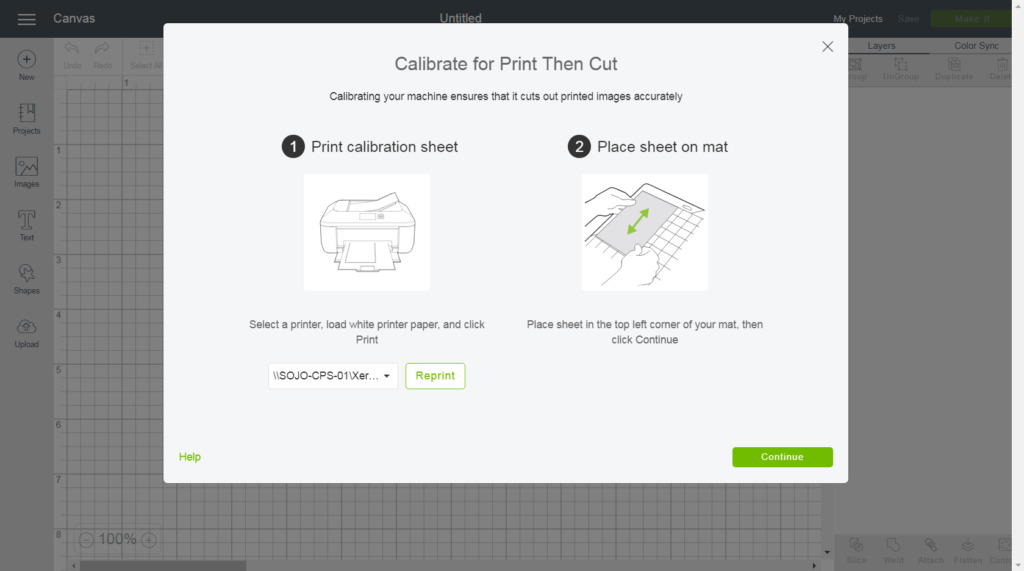
- Select the printer you will be using, and press the Print button.
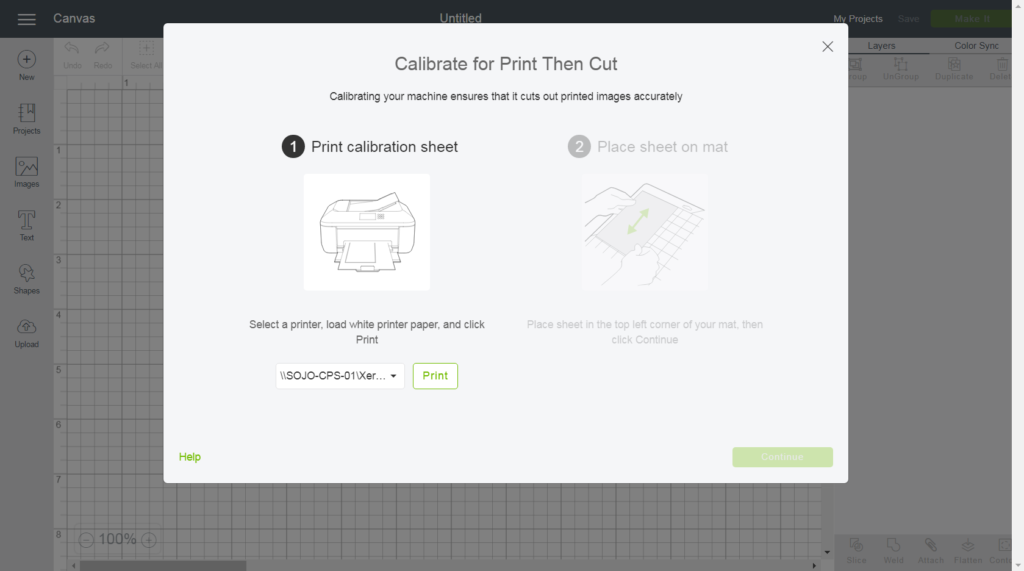
- Put the calibration sheet on the cutting mat on the top left side. Hit the Continue button.
- Make sure the Cricut machine is on and connected to a desktop via Bluetooth or a USB cable.
- Select the Cricut model from the drop-down menu on your next screen.
- Select the material setting, take the mat into your Cricut machine, and hit the Go button.
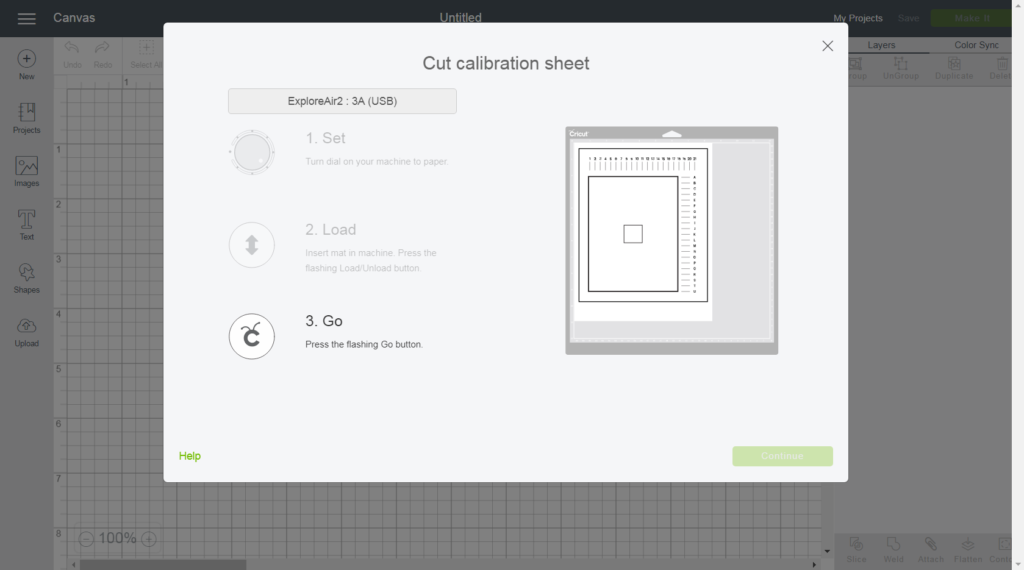
- The machine will start scanning the sheet for calibration marking.
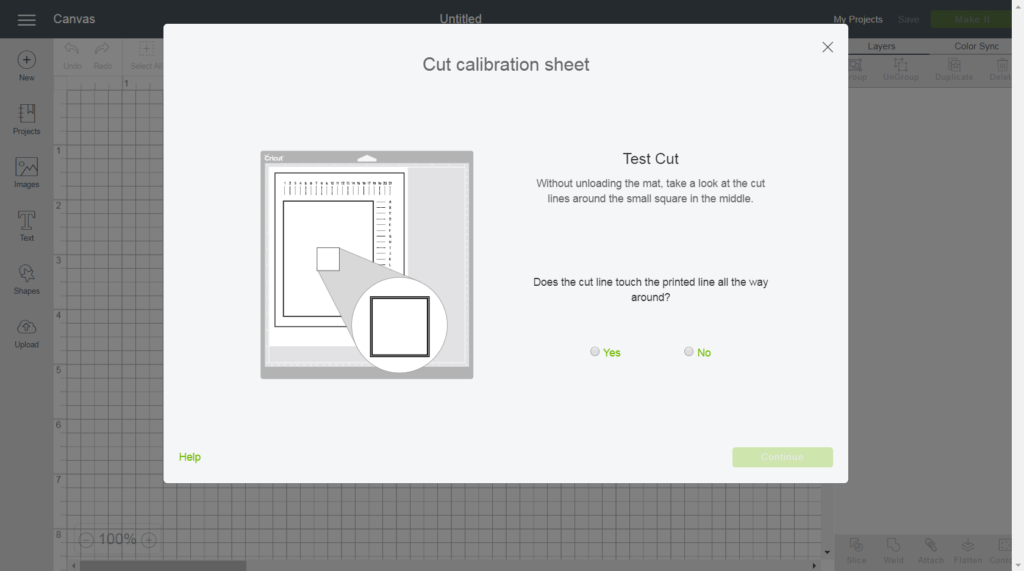
- Once complete, it will be cut around the smaller square of the sheet.
- Without unloading the mat, check the cut to see if the cut will touch the line all the way around.
- If this happens, press the Yes button in the Design Space software.
- Tap on the Continue button to proceed to the next step.
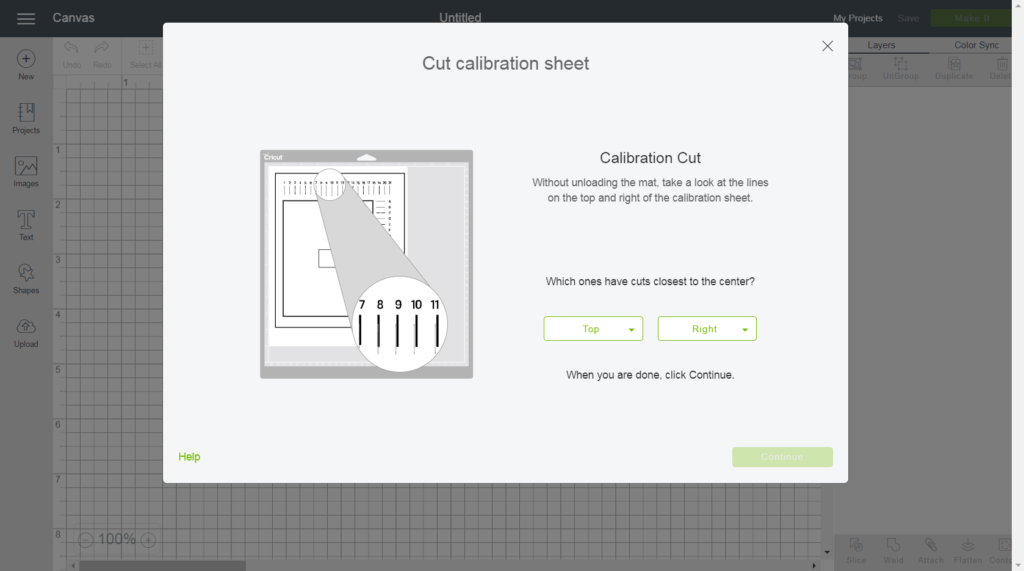
- The machine will initiate calibration cuts at the top and sides of the page.
- Once complete, and without unloading the mat, carefully line the top and sides of the page.
- The machine will initiate calibration cuts at the top and sides of the page.
- Some won’t touch the lines, and others will.
- The software will prompt you to select which letters and numbers are closest to the cut-printed lines.
- Click the Top button, then click the Right button to display the line letter or number with the cut closest to the line.
- Once done, press the Continue button.
- The machine will make a confirmatory cut around the large rectangle on the sheet.
- When it’s completed, take the mat off, remove the sheet and answer the last question in the Design Space software.
- If you’re happy with the cut, press Yes, and Continue to the last calibration screen.
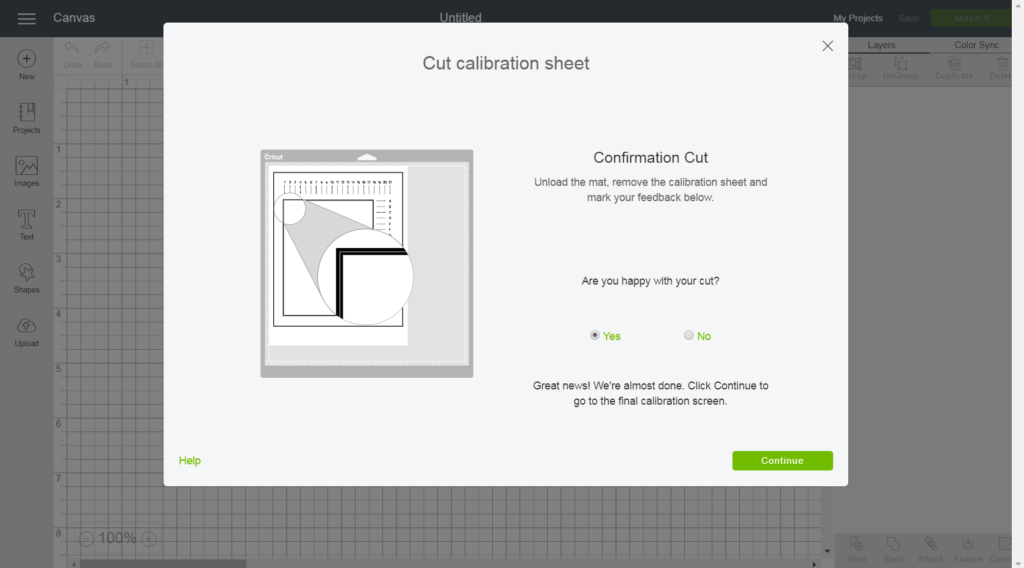
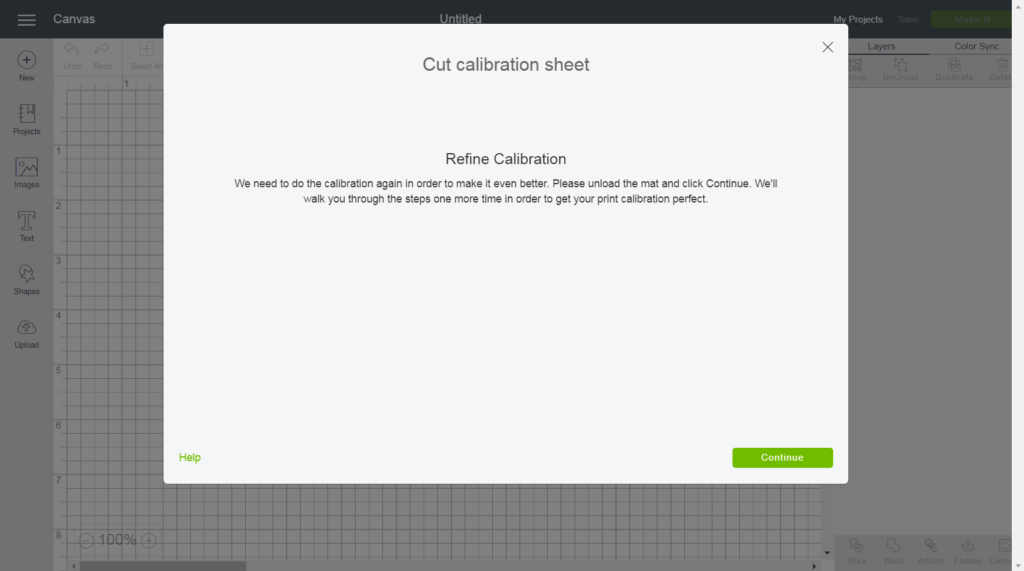
- If you press No, you’ll be guided to make it via the calibration procedure again.
- Now, press the Save & Close button to save the calibration settings.
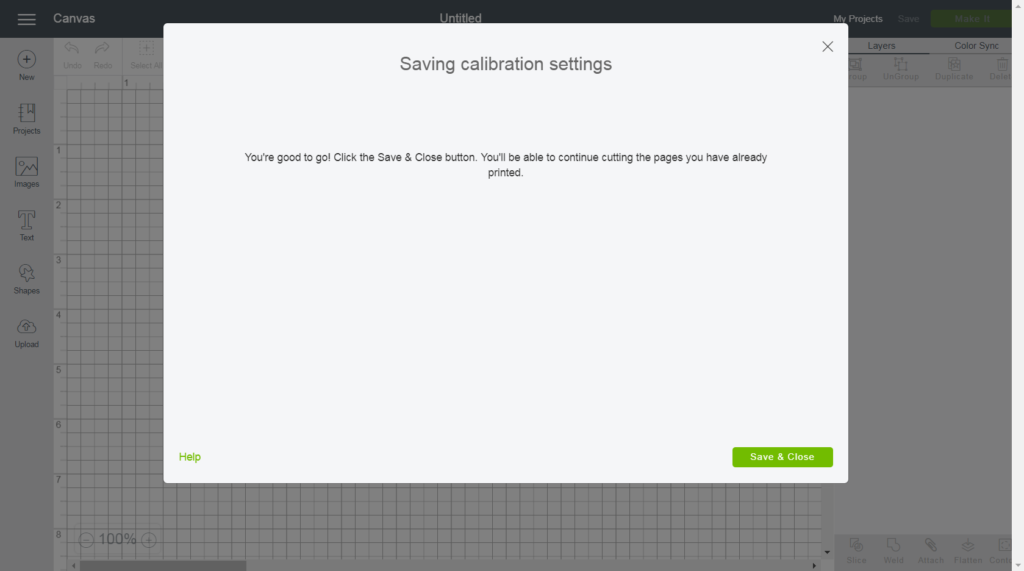
- Finally, you are ready to start the Cricut Print Then Cut feature.
![How To Change Cricut Blade? [Learn Here]](https://cricutsetmaker.com/wp-content/uploads/2022/12/How-to-Replace-Cricut-Knife-Blade-4-150x150.jpg)